My First Bucilla Felt Stocking Kit: Ironing, cutting, sequins

Posted on January 21, 2021
Now that I have all of my kit components organized, I can finally start putting the Bucilla Jolly St. Nick stocking kit together. While I know those of you who have put together many of these stocking kits have some nifty, time-saving tricks (like embellishing the felt before you cut out the pieces), I have decided to follow the instructions as they are printed. I want to see how it goes. But I am going to iron my felt (which is not talked about in the instructions).
Ironing
The felt comes all folded up in the packaging, so when you unfold it, there can be some pretty deep creases in the felt. To get rid of these, you can iron your felt very carefully.
WARNING: the felt in the Bucilla kits can melt if heated too high. I chose to iron my felt using a Teflon ironing sheet. You can also iron the back side of the felt on a very low setting (do not iron on the printed side directly).
Cutting
If you read the kit instructions, you will quickly learn that Bucilla recommends cutting out only the piece(s) you are working on. They say “DO NOT cut out all the pieces at once.” I imagine this is for two reasons; 1) it would be very hard to keep track of all the tiny pieces of felt, and 2) the pieces are all numbered, but the number is printed outside of the piece:
You can see the piece above is number 39. If I were to cut it out, I would have no idea what number this piece is . . . and the numbers will be important when using the instruction’s Design Chart to figure out where to put this piece on the stocking.
The instructions for the Jolly St. Nick kit are surprisingly short. The first step is to sequin the stocking front (piece #1). So, I have to cut out piece #1. I bought a brand-new, medium-sized, sharp scissors, and I took my time. I’ve cut just inside the white line because I do not want any of the white ink to show on my final stocking (you can see the white line from piece #1 on the left side of the felt picture above).
Adding Sequins
There are a few things that are consistent with all Bucilla felt stocking kits when embellishing with sequins:
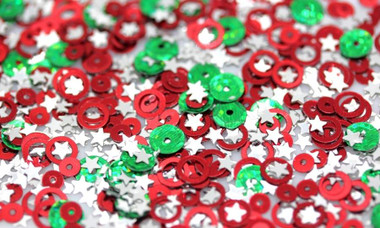
- All sequins are secured to the felt using a bead.
- Most sequin colors use a clear bead to secure the sequin down. The exceptions to this rule are: Red sequins use a red bead, and black sequins use a black bead.
- Use the beading needle (the needle with the very small eye) to attach the sequin and bead.
- To secure the sequin and bead, use one strand of floss that matches the sequin color. Knot the end of the floss with three or more knots (so it doesn’t pull all the way through the felt).
- The spots to secure sequins are marked on the felt with a dot.
The next question is how do I know what color sequin to put on these dots? The instructions include a Design Chart that shows you a symbol for the color of sequin you should use. The instructions say, “Only a few sequins are shown on the Design Chart. Continue to attach sequins of the same color to each applique.”
The Design Chart shows a club symbol near the number 1 (piece 1, the front of the stocking), and when I refer to the Color/Symbol Guide, it tells me that the club symbol is for light green sequins. I also double-checked the photograph of the finished stocking that comes with every kit, just to make sure I’m reading the charts correctly.
So I will use a light green sequin on all the white dots on piece #1 (the front piece of the stocking).
To fasten a sequin to the felt, you:
- Come up through the bottom of the felt, right at the dot marker
- String a sequin and then a bead through the needle
- Bring your needle back down through the sequin hole, but not the bead hole
- Voila! On to the next one!
I have to tell you, attaching the sequins to the felt is a bit addicting. I did run into one question that isn’t answered by the instructions in the kit. Do you tie a knot under each sequin and start again at a new spot? Or do you just go from one spot to the next without cutting the floss. I decided on the latter if there were sequin markers near one another. I think the felt is thick enough that my floss colors won’t show through, and I think I will line the back of my stocking front, so the extra thread won’t get snagged.
Also, it's okay to break the rules a little! Adding different sequins and beads is an easy way to make these kits your own. I’ve talked to many Bucilla felt kit makers who add their own beads or different size sequins to their kit’s design. Check out Michelle W.’s “bead hoard” (as she calls it!). It would be so much fun to pick a sequin or bead from this container!
Here is a photo that Donna Z. sent of the finished Bucilla Believe Wall Hanging Kit by Mary Engelbreit. I can see that Donna added some extra crystal beads in Santa’s coat, on the candies, on the wreath, etc. Beautiful!
Here is my Jolly St. Nick felt kit . . . step one complete!
Thanks to Michelle W. and Donna Z. for your pictures. I look forward to watching my Jolly St. Nick kit come to life as I move forward. - Kirsten
